Google Play
Setup Instructions
Google Play Store integration requires data from your application in the Google Play Console. For this, a project on Google Cloud is necessary so that IAPGUARD can authenticate and access your Google Play application backend via the Google Play Android Developer API. Due to the nature of this integration requiring multiple Google backends, there will be a bit of jumping back and forth between them.
Note that the initial setup and configuration of your project in Google Cloud can take up to 36 hours for it to successfully establish a connection to the Google Play API. During this time, testing receipt validation with IAPGUARD will fail, even when sending valid receipts.
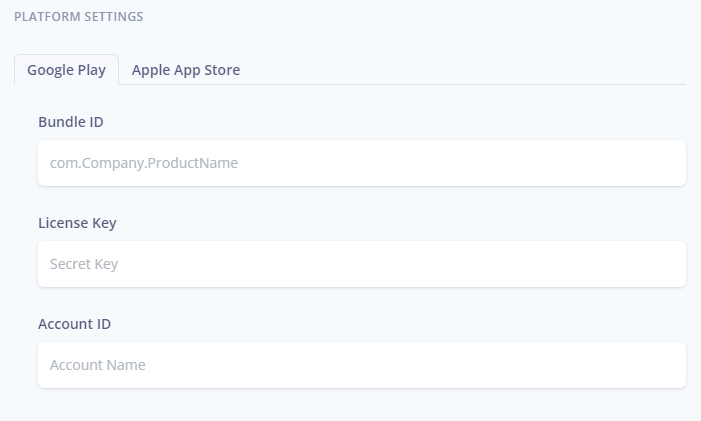
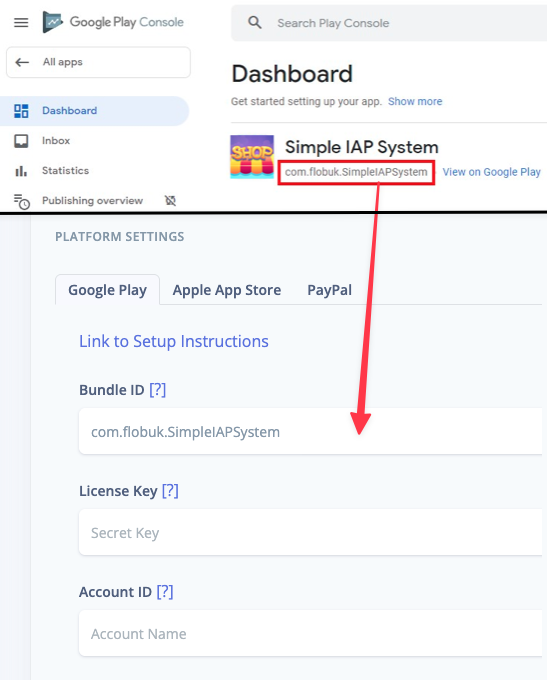
In the following screenshot, you can see the required fields we are going to fill out. Edit your Application to get started.
Please contact Support if you have issues with this process or require further assistance.
Bundle ID
The Bundle ID is displayed when editing your application in Google Play Console.
1. Open the Google Play Console
2. Navigate to Your App > Dashboard
3. Copy-paste the identifier below your app name into the IAPGUARD Dashboard as Bundle ID
Account ID
The following actions will take place on Google Cloud. We will create a service account with financial permissions that can access your order management in Google Play for the purpose of receipt validation.
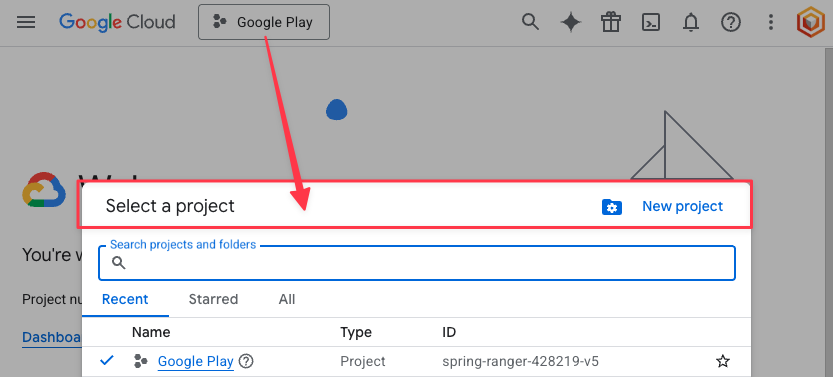
1. Open Google Cloud.
2. Select an existing project, or create a new one.
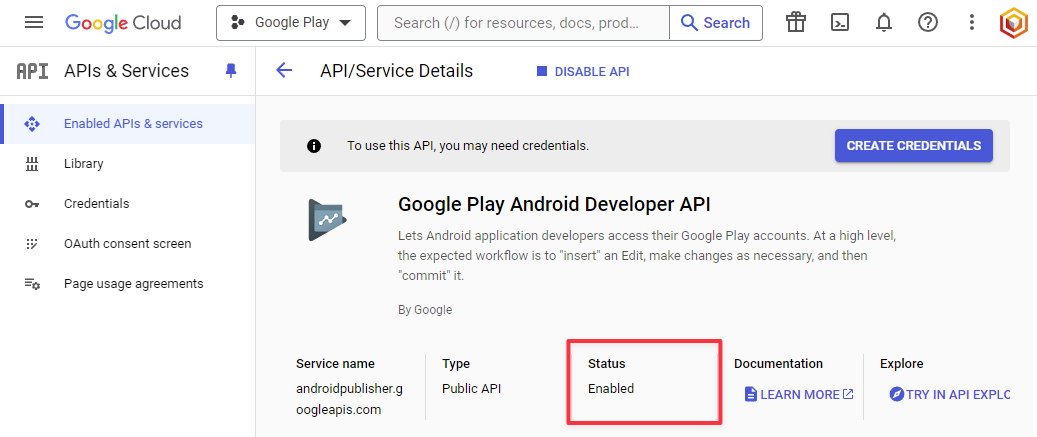
3. Navigate to Google Play Android Developer API and enable it
4. Navigate to Service Accounts (IAM & Admin > Service Accounts)
5. Create a new Service Account and skip the optional steps

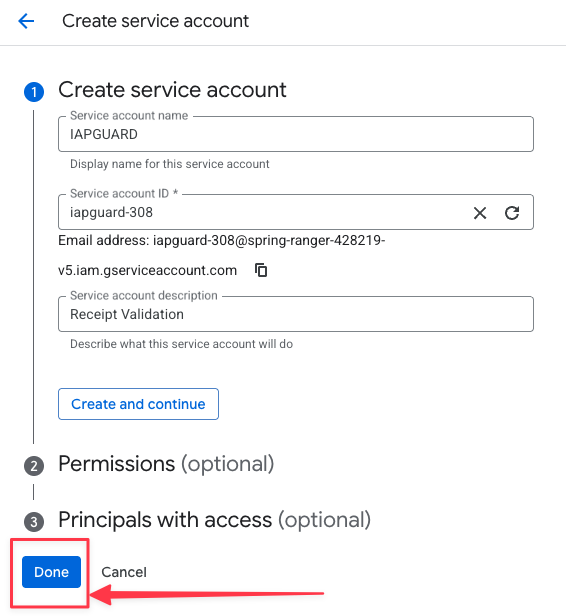
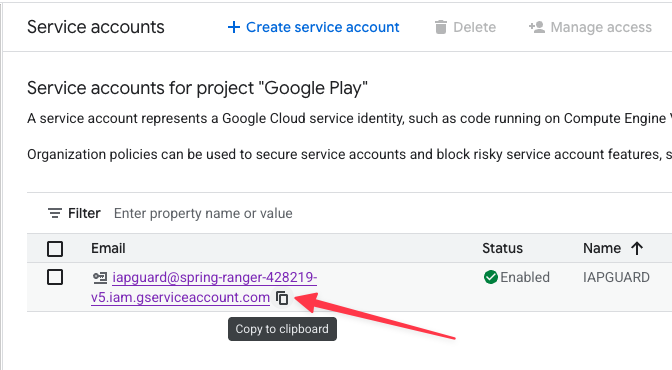
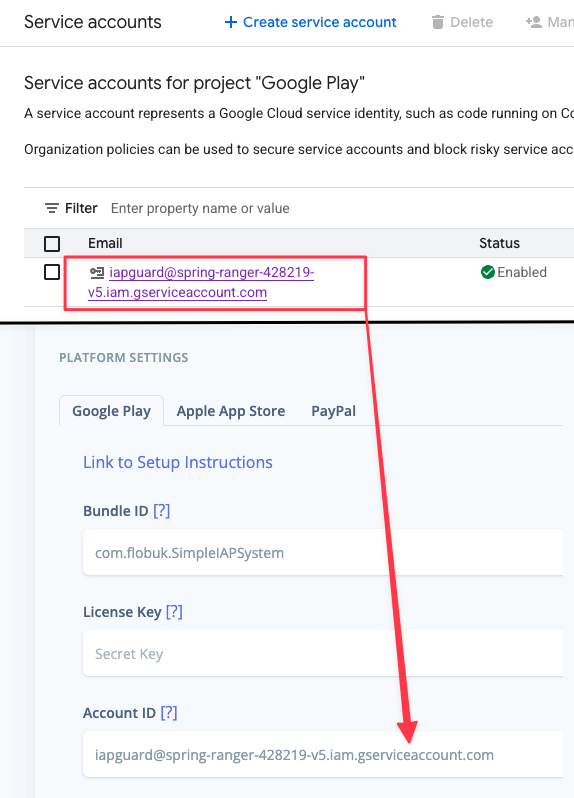
6. Copy the Email that identifies your Service Account
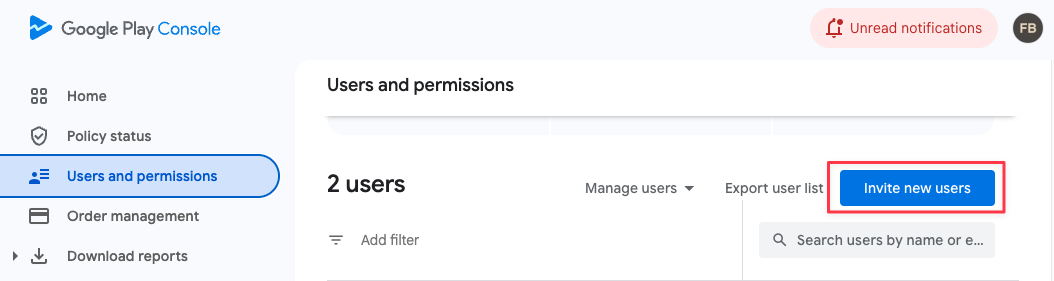
7. Open the Google Play Console
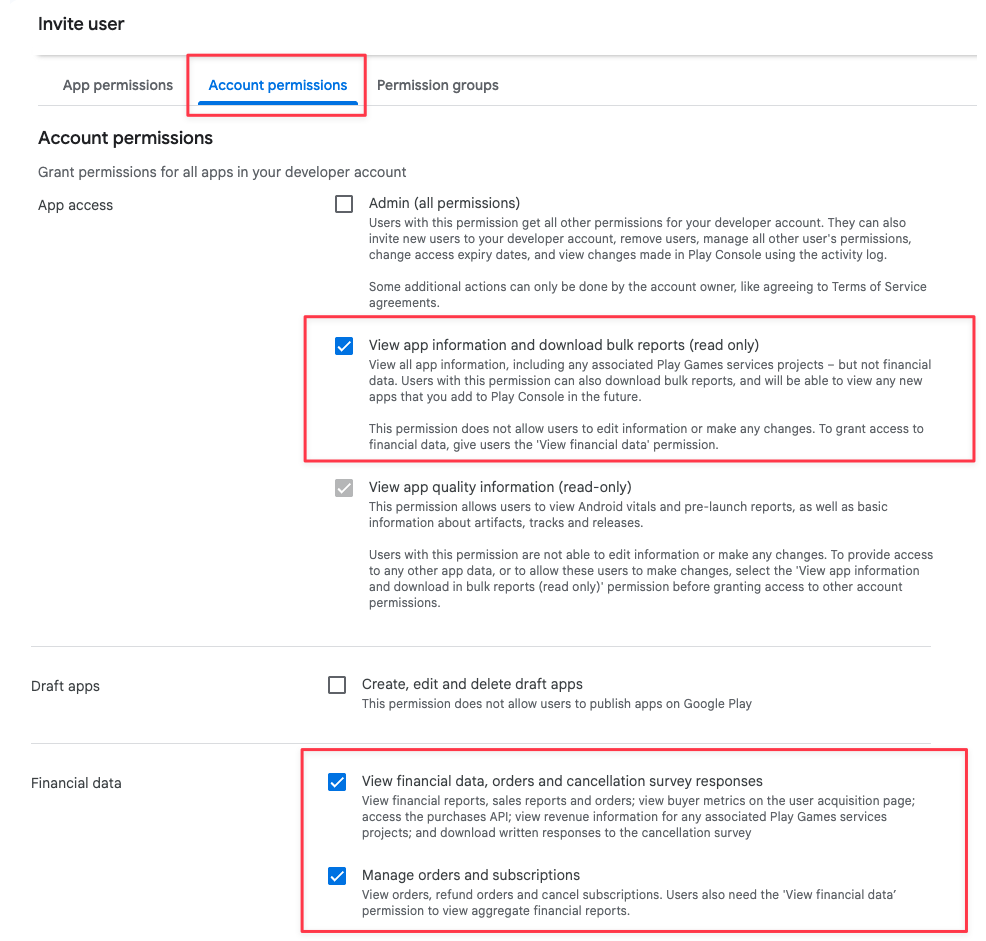
8. Navigate to Users and permissions and click on Invite new users
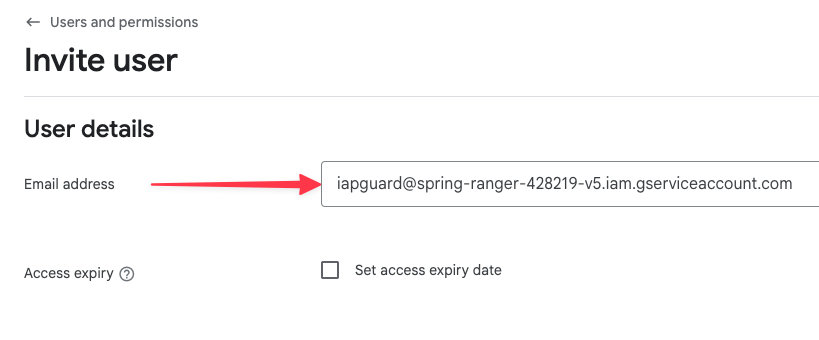
9. Paste the Email you've copied fron your Service Account on Google Cloud
10. Scroll down to Permissions and grant account-wide permissions to:
- View app information and download bulk reports (read only)
- View financial data, orders and cancellation survey responses
- Manage orders and subscriptions
Instead of account-wide permissions, you can also grant permissions for individual apps only, if you wish to.
11. Paste the Email of your Service Account into the IAPGUARD Dashboard as Account ID
If you do not want to wait 36 hours for Google to take over your changes and service account permissions, you can head to your app's In-App Products or Subscriptions section in the Google Play Developer Console and quickly Disable & Re-Activate a product to force an update by Google. This is not an official workaround but was confirmed to work for many other developers.
License Key
Please note that the following key file can only be downloaded once, so make sure to save it in a secure location.
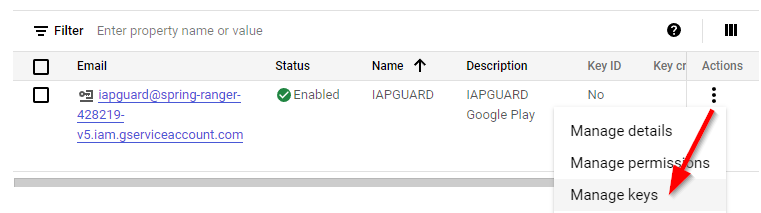
1. In Google Cloud, navigate to Service Accounts (IAM & Admin > Service Accounts)
2. Select Actions > Manage Keys
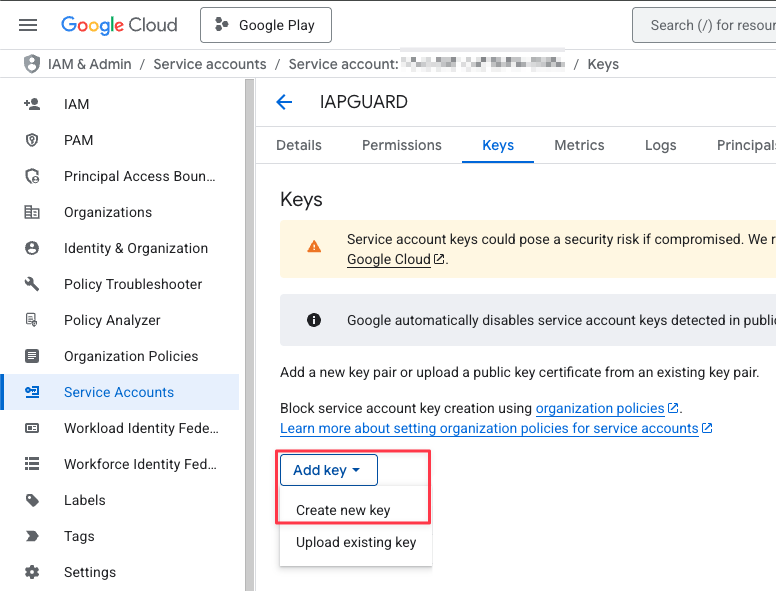
3. Add a new JSON key
4. Open the downloaded JSON file
5. Copy-paste the value for private_key into the IAPGUARD Dashboard as License Key (without quotation marks)
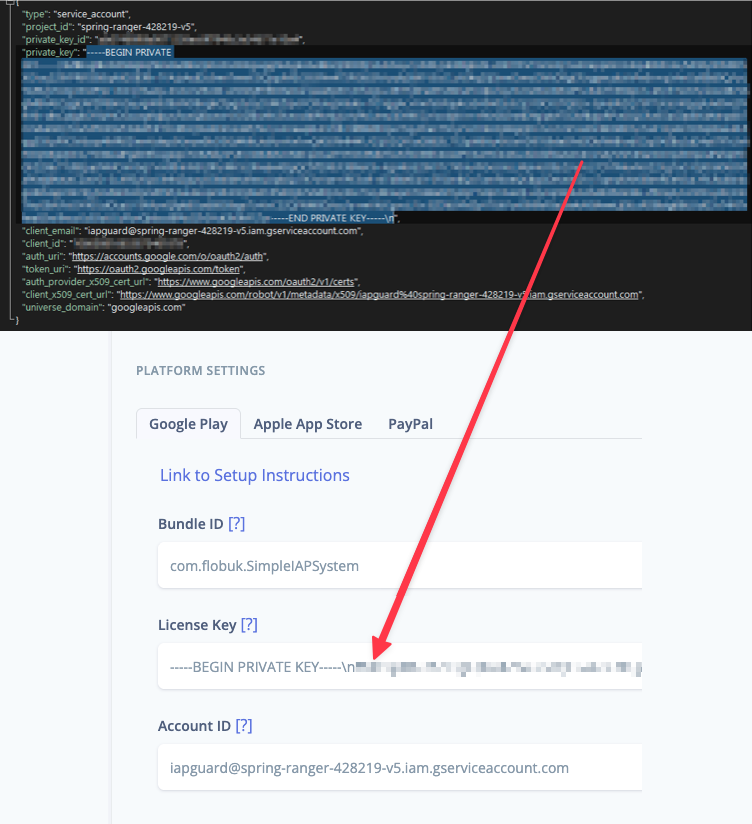
Again, note that the full key should be copied, including the -----BEGIN PRIVATE KEY... -----END PRIVATE KEY-----\n parts.
Server Notifications
This step is required when offering subscriptions. Real-time developer notifications (RTDN) enable IAPGUARD to receive information about subscription states and expirations in realtime for updating user inventory.
Google Real-time developer notifications (RTDN) using the Pub/Sub service are not completely free, however there is a free contingent of 10 TiB per month. This should be sufficient to process millions of messages every month. It is unlikely that your applications receives that many messages, except if you have hundreds of thousands of in-app purchases as well.
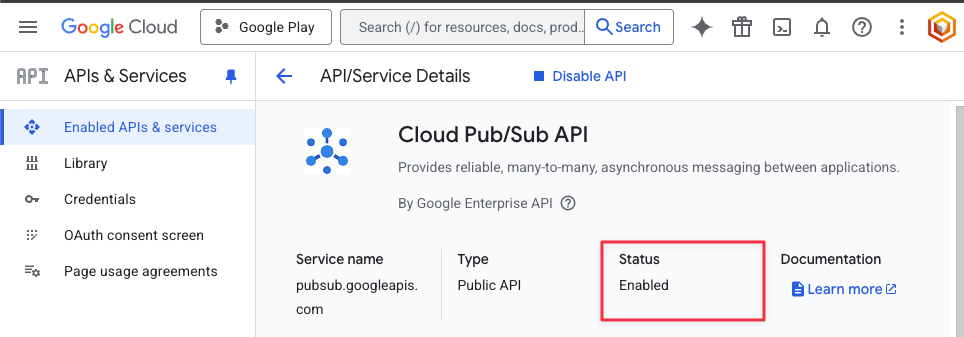
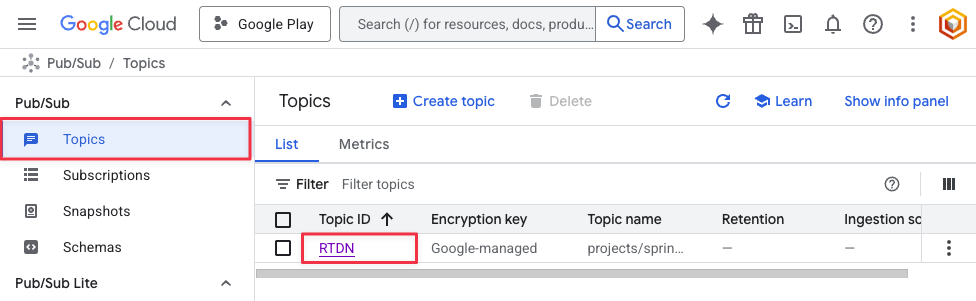
1. Navigate to Cloud Pub/Sub API and enable it
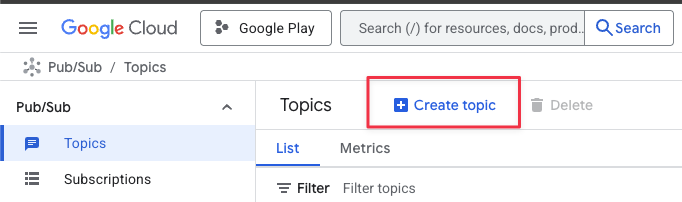
2. Navigate to Pub/Sub (Solutions > All Products > Analytics > Pub/Sub)
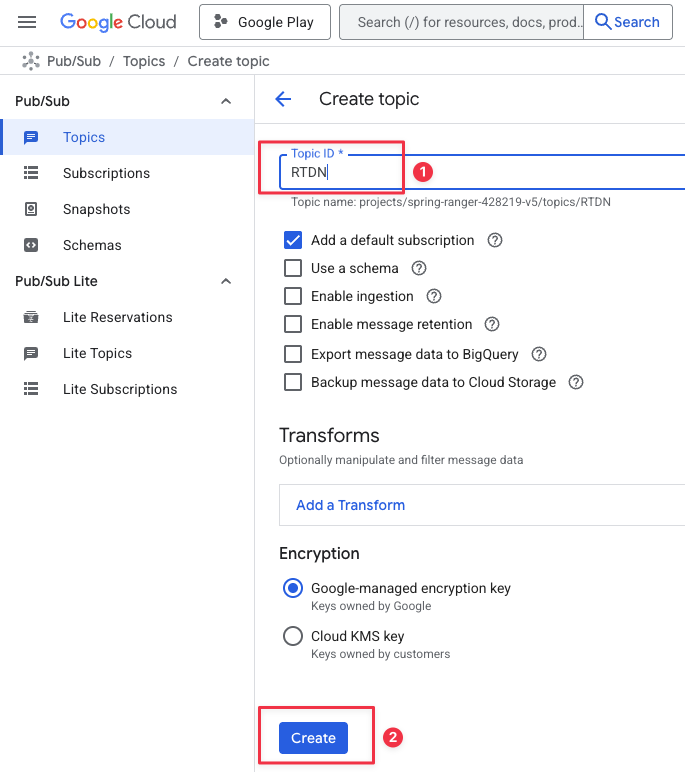
3. Create a new Topic with a default subscription
4. Select the topic and click on Add principal in the info panel
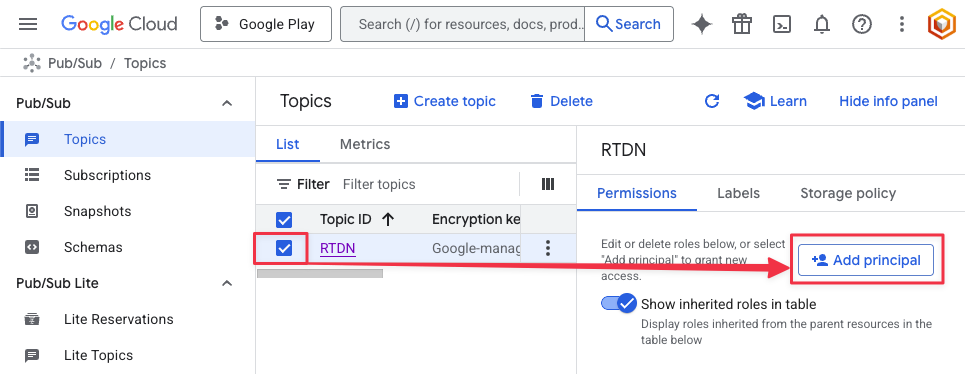
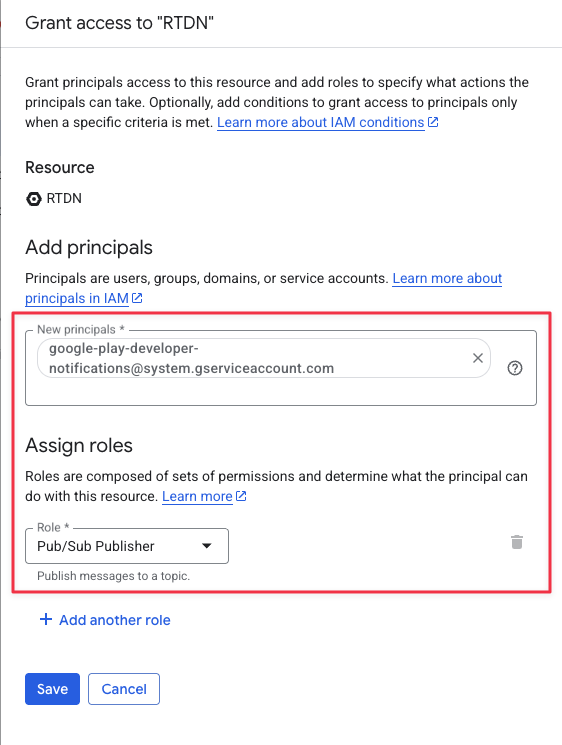
5. Add google-play-developer-notifications@system.gserviceaccount.com with the Pub/Sub Publisher role
6. Edit the subscription under the Subscriptions menu
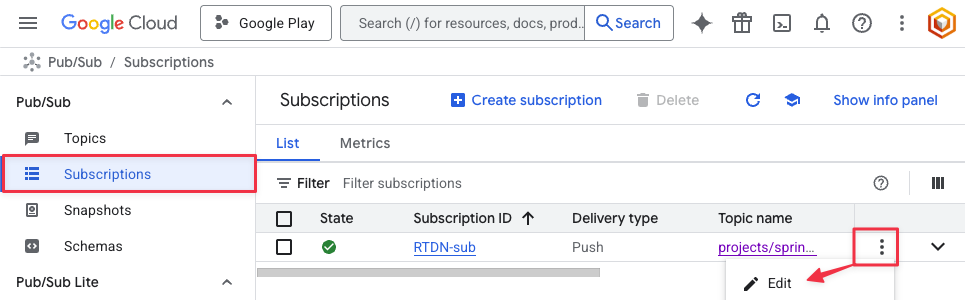
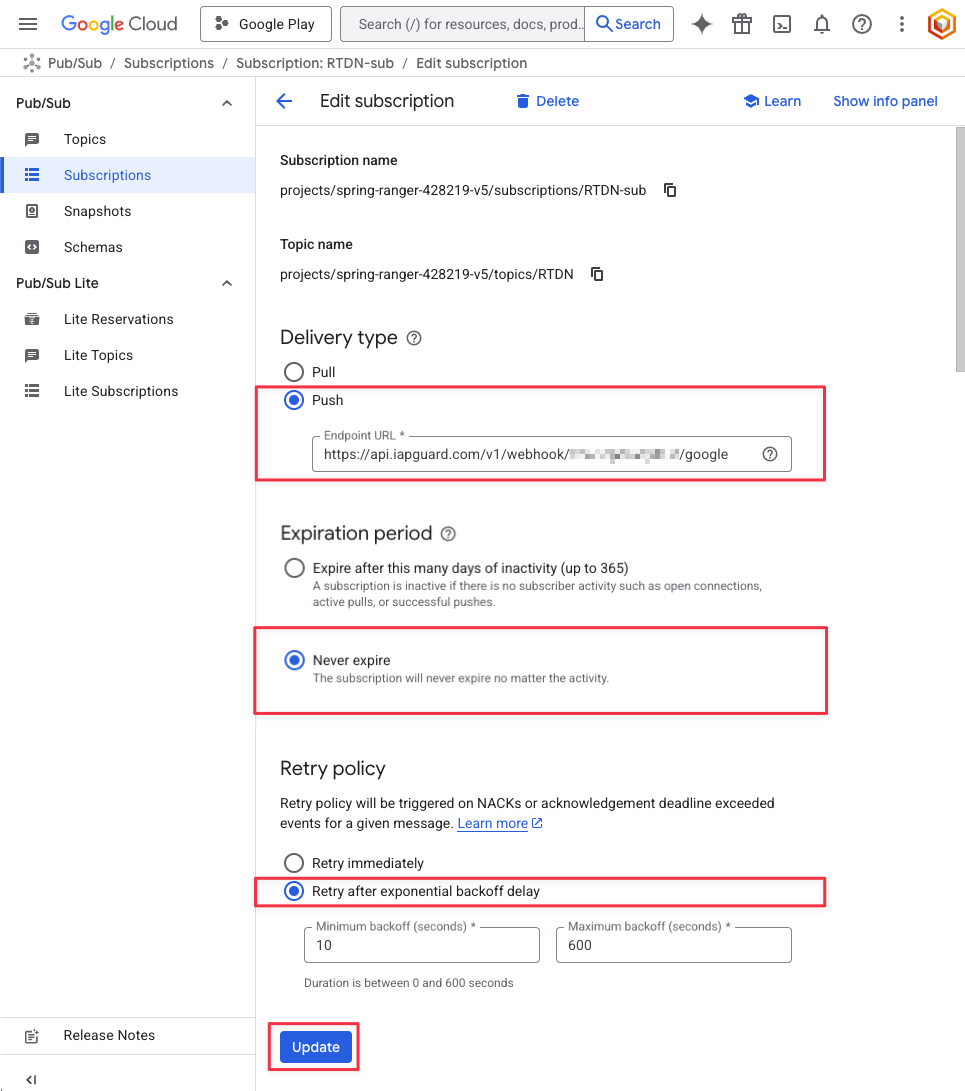
7. Proceed with the following modifications:
- Change Delivery type to Push
- In
Endpoint URLenter the following URL and replaceYourAppIDwith your actual 16-digit Application ID from the IAPGUARD Dashboard (found at the top of the Edit page)https://api.iapguard.com/v1/webhook/{YourAppID}/google - Change Expiration period to Never expire
- Change Retry policy to Retry after exponential backoff delay
- Save using Update
8. Navigate back to the Topics menu and open your Topic
9. Open the Google Play Console in a second Browser tab
10. Navigate to Your App > Monetise with Play > Monetisation setup
11. Check Enable real-time notifications and copy-paste your Topic name from Google Cloud
